It's Christmas!!
To be fair the Christmas excitement has been filling our household since early November, perhaps even October for some of us. We had watched some Christmas movies and Michael Bublé was already playing. But as soon as thanksgiving was over we went straight to hunt for our tree and yes it is another huge one.
We managed to get another 9 foot tree, although I suspect its a little bit taller than that. Andrew is very pleased with himself as it was one of the biggest trees there. We did look at another tree but when the guy held it up it was just too large. It would have filled our living room.
Putting the tree up in our house is always fun. Poor old Macintosh always gets a bit scared and worried. He doesn't like this giant green thing that's invading his space. The size of the tree means I always end up standing on something trying to help balance it and keep it straight whilst Andrew's fixing it into the base. Eventually its done and then suddenly Macintosh remembers he likes giant green trees. They provide him with an additional water bowl and he can also crawl around underneath it whilst it strokes his back. Silly dog!
So anyway, we kept the cardboard houses Andrew made last year and just added some new pieces that we bought. I tried to keep the natural look going with lots of natural textures and red and white as accent colours. Its not quite Pinterest worthy but I love it.
Coming in through the front door, the first thing you'll see is our wreath. Its the same twig wreath that I just keep adapting to fit the occasion. So far its been completely worth its money!
There is our giant tree. Complete with crooked top section and Macintosh asleep on "his" sofa. The tree rather dominates the room but it makes the place feel Christmassy quite easily!
The stockings are pinned up on the sideboard in the absence of a fireplace. (Macintosh has his by his bed!) The advent candle is on the sideboard too so we remember to burn it. We also got this amazing red and white patterned candle on sale last year and I've been waiting excitedly to burn it ever since. The logs were scrounged from the desert around us and hauled back by Macintosh and Andrew after their long walks.
The other sides and surfaces have little touches of Christmas, from garlands to cardboard houses or other bits. It helps spread the Christmas feeling around the room. Our open plan living space can feel quite large so with a giant tree and lots of Christmas bits scattered around it makes it feel cosier.
But the dinning table is my favourite part by far. On one of Andrew's walks he found a long log that he adapted into this amazing centrepiece for the dining table.
That bit might actually be Pinterest worthy as I stole the idea from there in the first place. Andrew drilled some holes in the logs for the candles and voila a centrepiece. Can't wait to start eating meals at the big table.
So there you have it, our Christmas decor for 2015. As many of you won't get to see us over the holiday season I hope you can picture us having Christmas over here a bit more now.
H
Showing posts with label Creative. Show all posts
SUMMER DECOR
A little while ago I gave out a sneak peak of the decor on Instagram...
It had taken me a while to land on a design idea for the summer decor as every time I looked on Pinterest it appeared to be 4th July inspired decor. Now I'm not bitter about the independence of America. Doesn't bother me one bit, I'm happy to barbecue and have a party, but I draw the line at celebrating it by decorating my house in the stars and stripes! So once I'd settled on an idea the ball got rolling a bit quicker.
Andrew helped contribute towards this decor quite a bit. He helped come up with the overall look that we were going for. We then worked on the decor during the week of his night shifts. Each of us would do a little work on it and tweak it whilst the other was asleep/working. Overall I think it came out pretty well.
Here's a few little up close photos to show you some of the detailing on there. The bear came from Alaska, the parcel we wrapped ourselves and Andrew made the London skyline and the fake postage stamps.
And as a last minute point, you might want to know that the bunting has the Queen's head on it and says 'Rule Britannia'. See not bitter about Independence day at all! ;)
H
It had taken me a while to land on a design idea for the summer decor as every time I looked on Pinterest it appeared to be 4th July inspired decor. Now I'm not bitter about the independence of America. Doesn't bother me one bit, I'm happy to barbecue and have a party, but I draw the line at celebrating it by decorating my house in the stars and stripes! So once I'd settled on an idea the ball got rolling a bit quicker.
Andrew helped contribute towards this decor quite a bit. He helped come up with the overall look that we were going for. We then worked on the decor during the week of his night shifts. Each of us would do a little work on it and tweak it whilst the other was asleep/working. Overall I think it came out pretty well.
I have to say these flowers are my favourites. They are fake because I can't seem to make flowers last too long in the heat out here and it'd get expensive having a vase filled all summer. I enjoyed picking them out though and playing around with combinations. I've decided I definitely need to go to the LA flower market and bring home a serious stash of flowers!
We have a few little touches spread around the room too. There's a couple of bits set out on the side tables and then we added some bunting to our bookcase. I didn't want to go overboard this time. I wanted a less cluttered look. I prefer everything light and airy in the summer. Come autumn or winter I'll want the whole house covered in decorations because I love it!
Here's a few little up close photos to show you some of the detailing on there. The bear came from Alaska, the parcel we wrapped ourselves and Andrew made the London skyline and the fake postage stamps.
And as a last minute point, you might want to know that the bunting has the Queen's head on it and says 'Rule Britannia'. See not bitter about Independence day at all! ;)
H
A FACELIFT
Thought the blog could do with a little freshen up, so whilst you were all asleep in England we had a bit of a play about. We created a new logo that involved placing the beagle on pride rock in front of some fluffy clouds, paired it with a clear cut font that stands out and tweaked a few other little bits to create the new look. Voila!
Enjoy the holidays!
A&H
Enjoy the holidays!
A&H
CHRISTMAS TREE, OH CHRISTMAS TREE...
Some of you may have seen this picture on Instagram...
This year Macintosh even has his own little bit of decoration with his stocking up! Yes we are those people!
Now this photo shows my favourite part of the decoration (minus the tree). These houses were made by Andrew, out of card and without any templates. He got the initial idea from pinterest but the houses like these you can buy are ridiculously over priced. So he simply looked at a photo we found on the internet of a house, or church and then created these! They had battery operated tea-lights in so that the light flickers out through the windows. I know I'm slightly biased but I think they are amazing!
It is a picture of the 9 foot tall Christmas tree that Andrew gleefully bought. Since we have such tall ceilings he was determined to get a tall tree as in his own words, "We'll never get to do this again as we can't afford the houses in England that have tall ceilings." I must admit I couldn't fault his logic but the tree was a bit on the large side. Still whether it was love that won out, or submission, or just simply me being outmanoeuvred, whatever the case, we got the tree!
Getting it into the back of the Victor the Volvo to get it home was quite amusing and we even had one friendly American suggest we just put it in his truck and he'll take it home with him instead. I think that was the final kick Andrew needed as he suddenly managed to fit it in! Once it was home poor Macintosh got quite a shock as we dragged this giant tree through the house. The sight of me standing on a stool whilst Andrew scrabbled around underneath the swaying tree as he fixed it into the base caused Mac some worry too. Eventually it was secured though and the mammoth task of decorating began.
We already had some ideas of what we wanted to do. I like matching colour schemes and for everything to look thematic. Andrew is a perfectionist too, who likes the simple Nordic styles. As you can imagine the combination of the two us meant that this was no simple operation. It took a few days of prep to create what was needed and some frustration too on my part when surprisingly we didn't have enough ornaments for our now 9 foot tree! Thankfully Andrew and I like the tree to be more on the sparse side so that the greenery shows through, but still there's sparse in a stylish way and simply not enough! Our style this year is pretty similar to our usual one. Its Nordic, so there are lots of reds, whites and natural materials, with some greys thrown in as I love them so much!
This year Macintosh even has his own little bit of decoration with his stocking up! Yes we are those people!
Now this photo shows my favourite part of the decoration (minus the tree). These houses were made by Andrew, out of card and without any templates. He got the initial idea from pinterest but the houses like these you can buy are ridiculously over priced. So he simply looked at a photo we found on the internet of a house, or church and then created these! They had battery operated tea-lights in so that the light flickers out through the windows. I know I'm slightly biased but I think they are amazing!
That church is just my favourite. He even added a rose window in it for me. Its the little touches that I love.
So there we go, that's our Christmas decoration. We are now mostly ready for Christmas and as we count down through advent we'll be reading some devotions written by John Piper so that we can focus on the true meaning of Christmas, because although decorating is fun, that's really not the focus for us. I'm pretty excited though. It'l be different out here but that could be fun!
H
GALLERY WALL
Now I did warn you that I would be posting more updates to about our house as we did them, so for those who find our house details uninteresting go ahead and skip this post. For those who are still interested, we had decided early on that a gallery wall above the computer was a good option but we wanted to live in the house for a bit see how it would work, plus we needed to gather some pictures. Slowly but surely we gathered some pictures or pieces of art ready for the wall so this past weekend we set about putting it up.
Prior to actually knocking holes into the wall we had made some paper templates of the picture frames and had played about with different combinations. We wanted to get it right was this is the base of the gallery wall and we will add to it but it needs to look good now too. We had been living for the past week with the templates in the arrangement we thought we wanted and were pretty set on it, until about 10 minutes before we put them up when Andrew decided to change them round again. Cue my groans!
Once he had finalised (again) the set up he began putting the pictures up, starting with the largest picture in the centre. It wasn't the most accurate of processes. We did mark on the paper templates where the nails needed to go and Andrew made the holes through the templates, but getting everything level involved a plank of wood and a spirit level on our iPhones! We got there in the end.
And behold the gallery wall....
We are still going to collect different art pieces and will build it up over time but we are pretty glad to have it started and its already making our home feel that little bit more homely!
H
Prior to actually knocking holes into the wall we had made some paper templates of the picture frames and had played about with different combinations. We wanted to get it right was this is the base of the gallery wall and we will add to it but it needs to look good now too. We had been living for the past week with the templates in the arrangement we thought we wanted and were pretty set on it, until about 10 minutes before we put them up when Andrew decided to change them round again. Cue my groans!
Once he had finalised (again) the set up he began putting the pictures up, starting with the largest picture in the centre. It wasn't the most accurate of processes. We did mark on the paper templates where the nails needed to go and Andrew made the holes through the templates, but getting everything level involved a plank of wood and a spirit level on our iPhones! We got there in the end.
We are still going to collect different art pieces and will build it up over time but we are pretty glad to have it started and its already making our home feel that little bit more homely!
H
BON APPETIT
We are also getting into our cooking stride with some surprisingly good meals, you know the recipes that you have never tried before but you feeling confident about. They may begin to look like they are going wrong but they turn out pretty amazing.
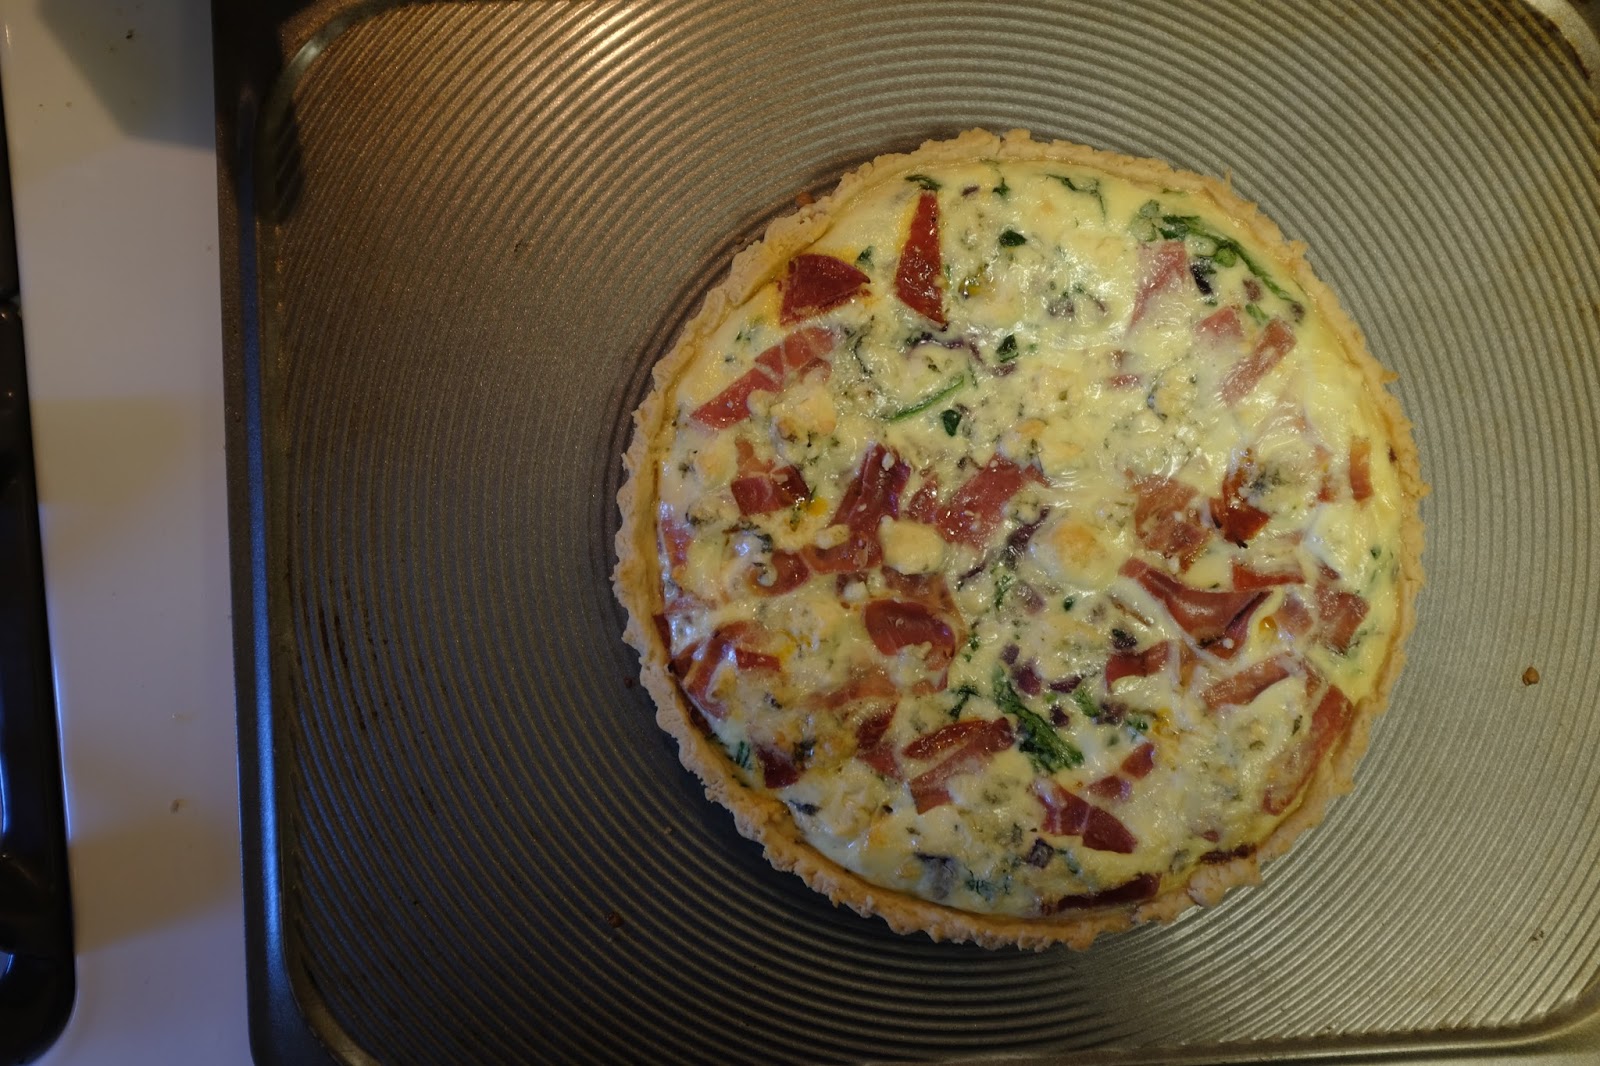
I had that with a quiche that I thought would be a fun alternative to use up a few leftovers instead of something like an omelette. I'm terrible at pastry at the best of times, it just doesn't like me. As I started to put this pastry in the tin I realised that the movers didn't pack the baking beans so I just had to go with it hoping the base didn't bubble up and go crazy. Well in the end it was perfect. I don't know why, I probably couldn't do it again but hey. Here's the recipe if you want to try it but I would cross check it with a reputable source first though.
Making the Pastry
Combine ingredients in mixer until its one lump. Cover with cling film and refrigerate for 20 mins. Preheat oven to 190C/375F. Rollout pastry and place in 25cm approx. loose bottom flan tin or something similar. Cut off excess. Pierce pastry with fork all over and bake for 15mins (use baking beads if you have them.)
When finished you should be able to be easily remove it from tin and place on a baking tray ready to be filled.
Making the Filling
While the pastry is cooking, fry the onions till soft.
In a jug mix the eggs, milk and cream. Pour into pastry case with the rest of filling a bit at a time so its all evenly added.
As long as the filling doesn't leak out of the pastry case you can cook it on a baking sheet. However if there are signs of leaking then place the pastry back into the flan tin.
Cook for about 25 minutes until the middle is set but still soft.
Then enjoy.
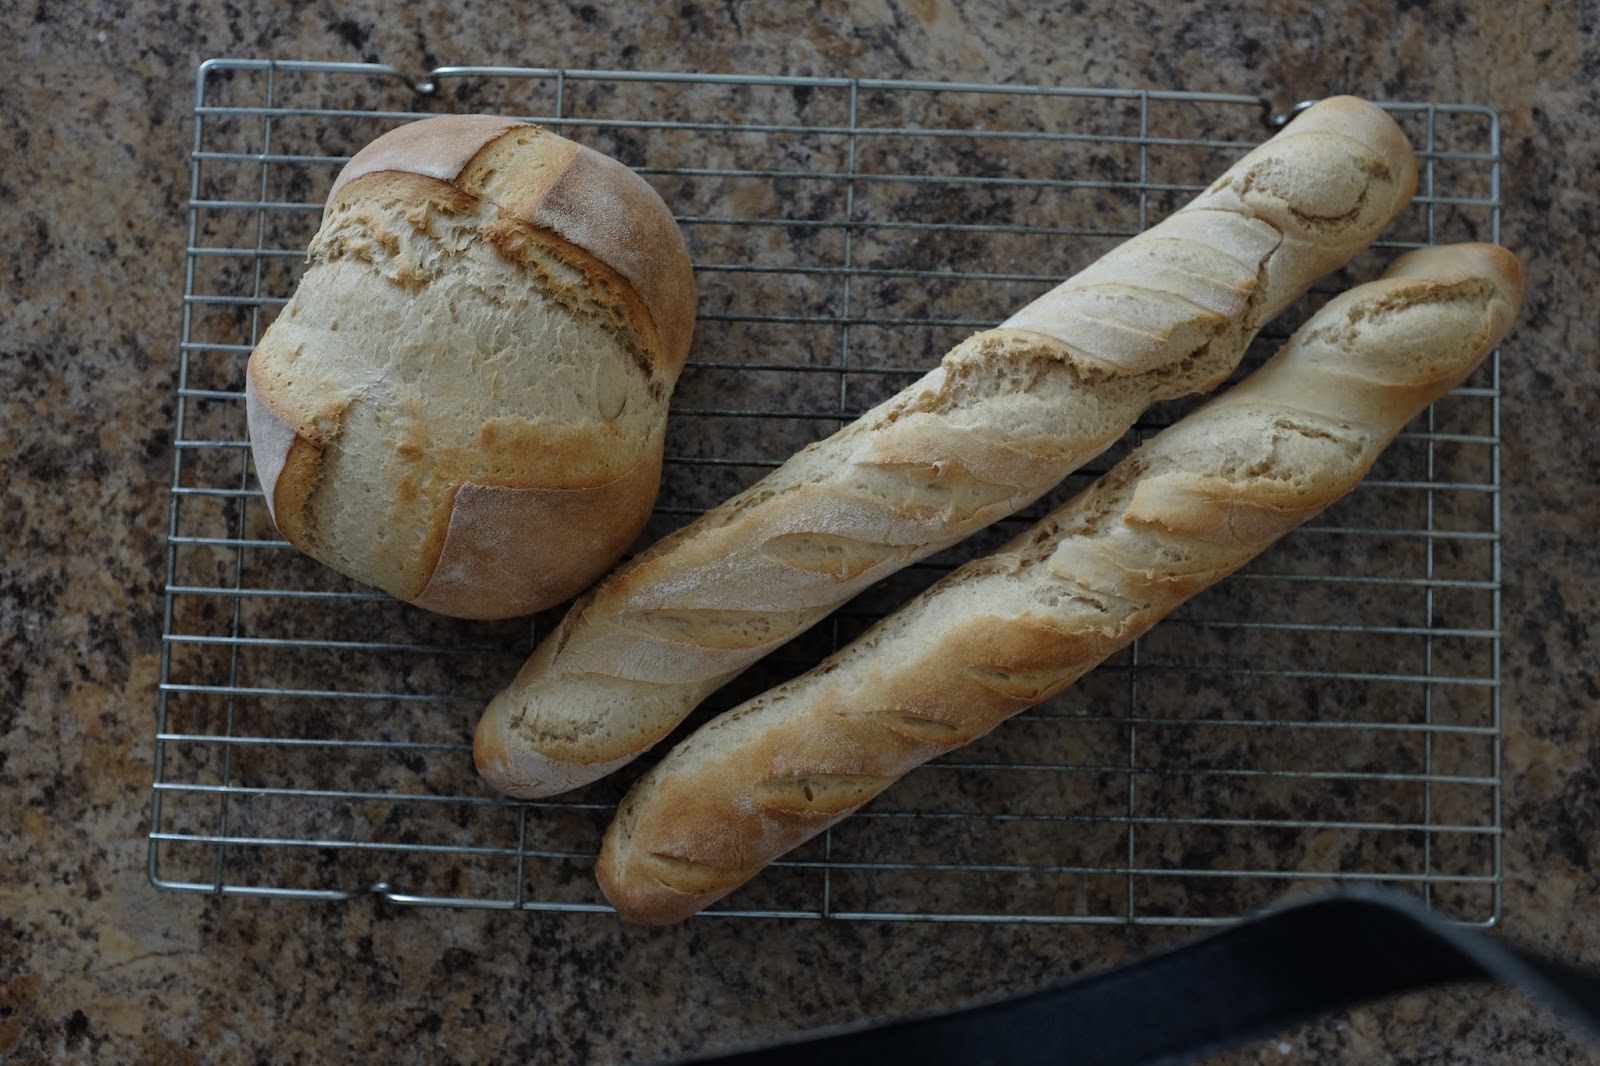
We also been trying our hands at bread and cake, here are some photos of them too.
A
I had that with a quiche that I thought would be a fun alternative to use up a few leftovers instead of something like an omelette. I'm terrible at pastry at the best of times, it just doesn't like me. As I started to put this pastry in the tin I realised that the movers didn't pack the baking beans so I just had to go with it hoping the base didn't bubble up and go crazy. Well in the end it was perfect. I don't know why, I probably couldn't do it again but hey. Here's the recipe if you want to try it but I would cross check it with a reputable source first though.
Quiche de Woodruff
Pastry
175g Flour
100g Butter
1 Egg yoke
2 Tbsp Water
Filling
3 Eggs
1 Egg white (from the pastry egg)
75ml Milk
75ml Cream
2 Handfuls of Rocket (wilted just before adding)
1/2 finely chopped red onion
100g of various meat (we had a salami, pepperoni and cured ham)
50g blue cheese
Combine ingredients in mixer until its one lump. Cover with cling film and refrigerate for 20 mins. Preheat oven to 190C/375F. Rollout pastry and place in 25cm approx. loose bottom flan tin or something similar. Cut off excess. Pierce pastry with fork all over and bake for 15mins (use baking beads if you have them.)
When finished you should be able to be easily remove it from tin and place on a baking tray ready to be filled.
Making the Filling
While the pastry is cooking, fry the onions till soft.
In a jug mix the eggs, milk and cream. Pour into pastry case with the rest of filling a bit at a time so its all evenly added.
As long as the filling doesn't leak out of the pastry case you can cook it on a baking sheet. However if there are signs of leaking then place the pastry back into the flan tin.
Cook for about 25 minutes until the middle is set but still soft.
Then enjoy.
We also been trying our hands at bread and cake, here are some photos of them too.
A
OUR BACKYARD
Having had a new tour of our house this week, I thought it would be good to give you the tour of the outside too. That needed a post of its own otherwise it would have been much too long.
Since we don't have a spacious backyard and our front area is pretty much a concrete jungle we have had to be creative. We wanted to make the space feel cosy and nice to hang out in without spending too much money. We also couldn't do too much to change the space so it all had to be moveable.
This was the last picture you all saw of the area. Well its changed quite a bit since then. The first step being to secure the area so we could send Macintosh outside without him escaping. So I set my handy hubby on the task and he built a fence for the back and a gate for the front. Now I make that sound simple but you have to realise you can't screw anything into the house as its made of cheese. So it all had to be hinged on the wood and hold its weight should a beagle decide to bash against it in a desperate attempt to get out! Thankfully its held up well, not that he's been bashing against it. He's quite content to sunbathe!
Once that had happened we needed to add some features. Andrew's idea of a feature was a BBQ. Mine was plants. Obviously we got both. Although by plants I mean grasses as they are the only things that seem to grow alright here in this arid climate. We also needed to add some shade and some lights for the evening. So those were both added pretty quickly.
The one thing that took the longest was some kind of outdoor table. We couldn't agree on what we wanted. I was thinking a coffee table initially, whereas Andrew had grand plans that would involve chaos! In the end once he'd made the desk there were some bits of wood left so he managed to create a coffee table from them which I then painted to fit our theme. (See the Instagram feed for a photo.)
So here we go, after that rather long pre-amble here is our backyard.
Now I'm off to enjoy some time in it!
H
Since we don't have a spacious backyard and our front area is pretty much a concrete jungle we have had to be creative. We wanted to make the space feel cosy and nice to hang out in without spending too much money. We also couldn't do too much to change the space so it all had to be moveable.
This was the last picture you all saw of the area. Well its changed quite a bit since then. The first step being to secure the area so we could send Macintosh outside without him escaping. So I set my handy hubby on the task and he built a fence for the back and a gate for the front. Now I make that sound simple but you have to realise you can't screw anything into the house as its made of cheese. So it all had to be hinged on the wood and hold its weight should a beagle decide to bash against it in a desperate attempt to get out! Thankfully its held up well, not that he's been bashing against it. He's quite content to sunbathe!
Once that had happened we needed to add some features. Andrew's idea of a feature was a BBQ. Mine was plants. Obviously we got both. Although by plants I mean grasses as they are the only things that seem to grow alright here in this arid climate. We also needed to add some shade and some lights for the evening. So those were both added pretty quickly.
The one thing that took the longest was some kind of outdoor table. We couldn't agree on what we wanted. I was thinking a coffee table initially, whereas Andrew had grand plans that would involve chaos! In the end once he'd made the desk there were some bits of wood left so he managed to create a coffee table from them which I then painted to fit our theme. (See the Instagram feed for a photo.)
So here we go, after that rather long pre-amble here is our backyard.
Now I'm off to enjoy some time in it!
H
Subscribe to:
Posts (Atom)